Wednesday, November 3, 2010

Turn signal, shifting lever and steering wheel removal (finally!)

The task of getting the steering wheel removed was a long and arduous one. The photos below span a couple of months, and the descriptions/photos aren't necessarily in proper order as far as when they occured - I'm revising history so it makes a bit more sense.


Steering wheel, turn signal and shifting lever from the start.


First task is the turn signal. The small plate shown is held on with a pair of small screws.


Next is detaching and removing the strap holding this part to the steering column, and disconnecting the wires from the turn signal switch.


Out it all comes!


Next up is the shifting lever.


The cap loosens up with a bit of leverage with a channel lock (with a rag to keep from scuffing the cap).


The lever itself pulls away easily - it basically just floats inside.


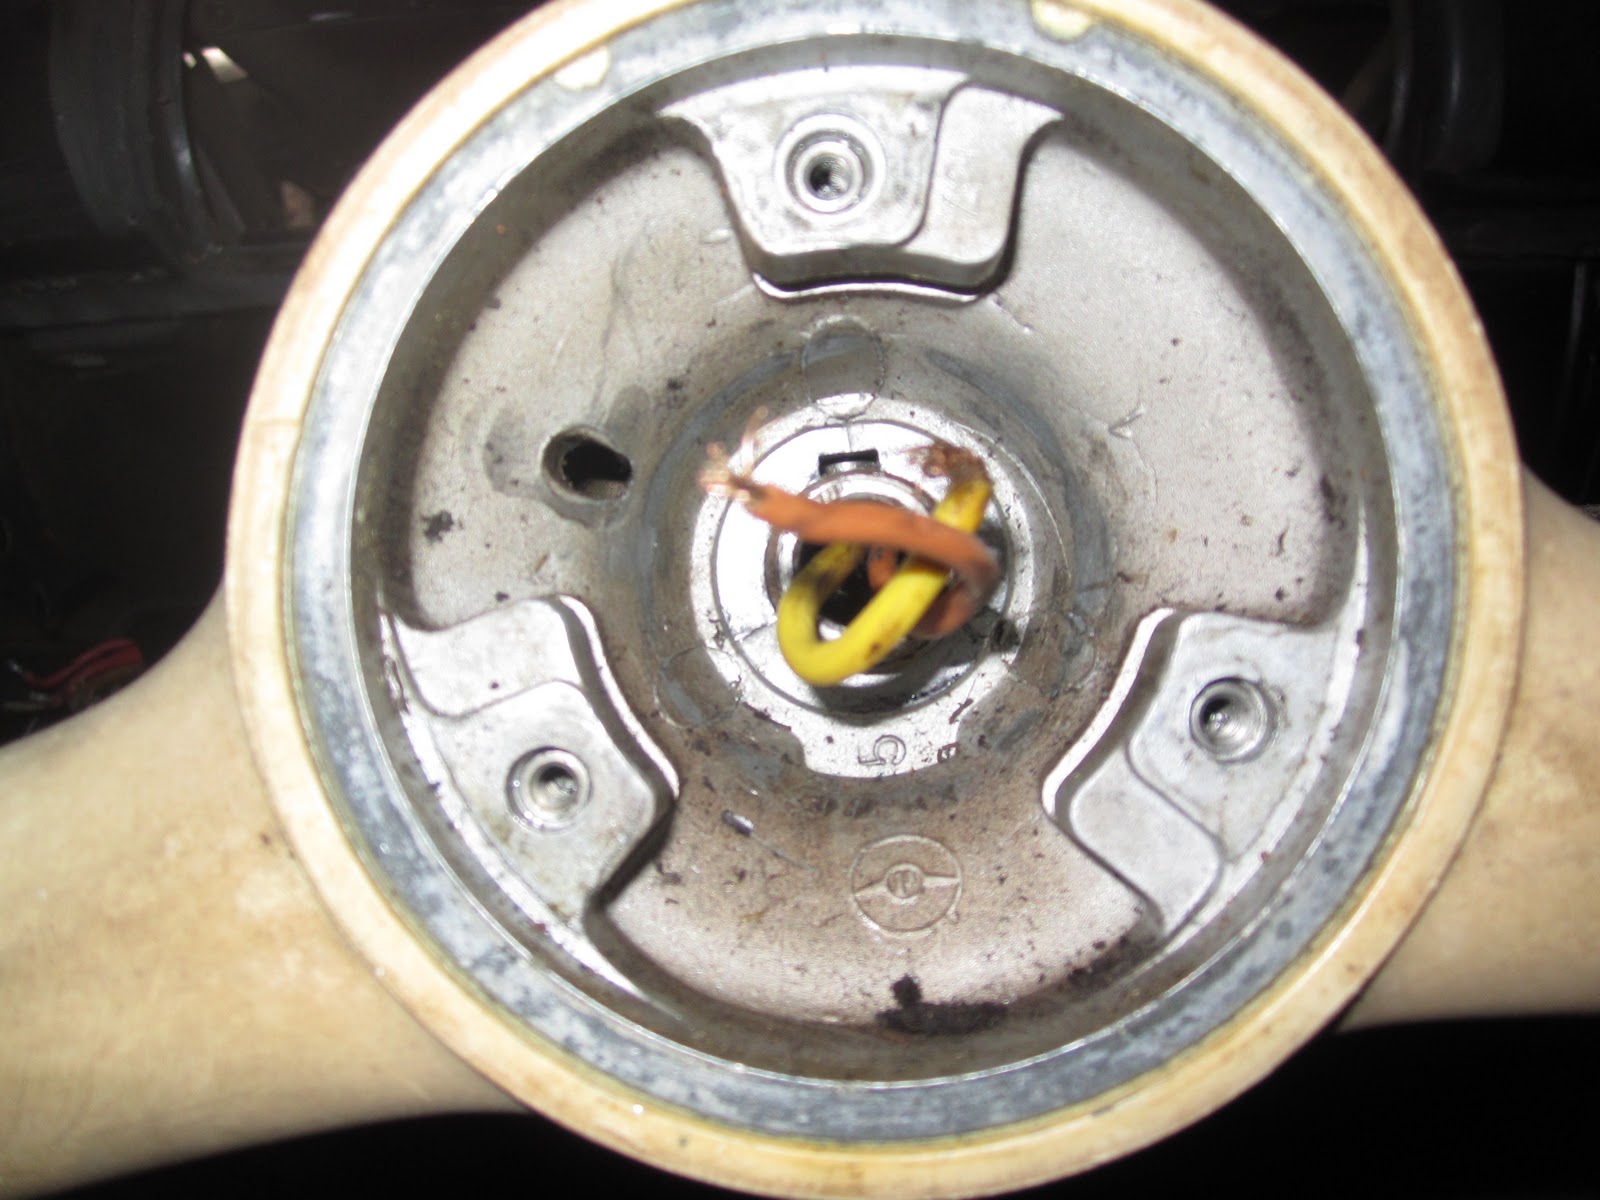
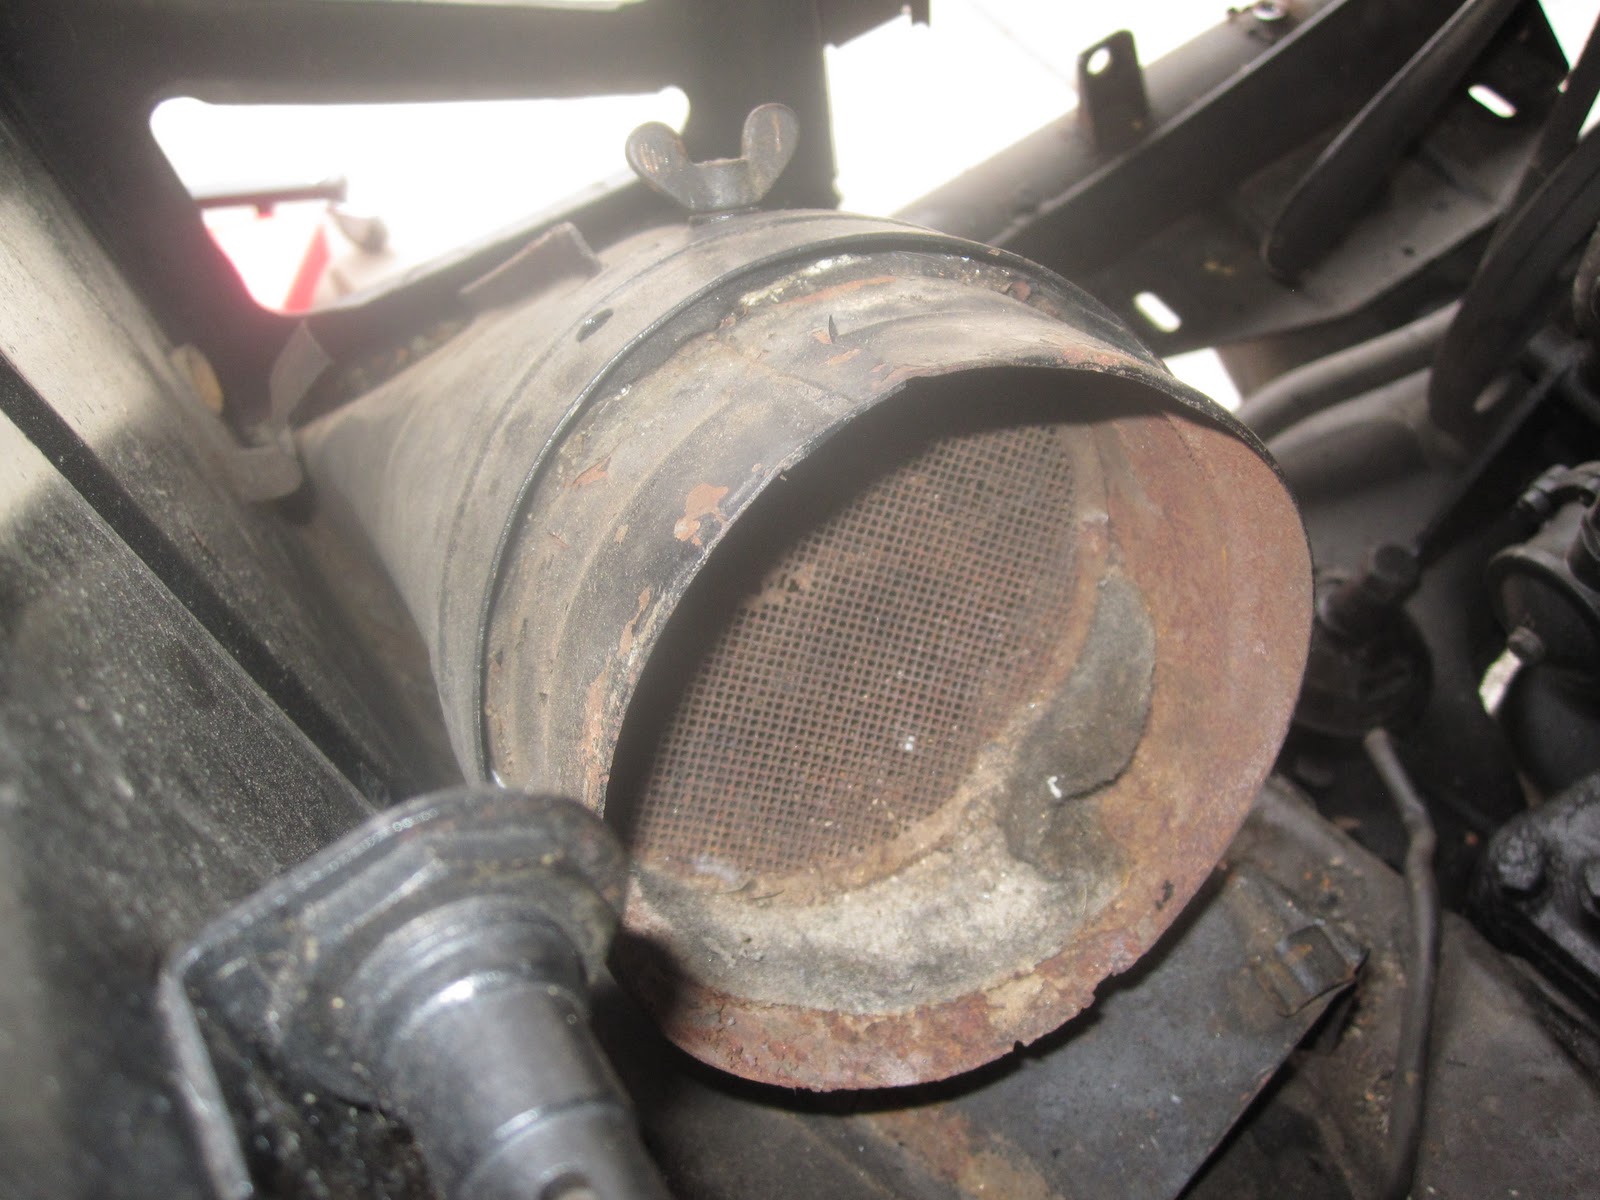
Now to the steering wheel itself. First thing is to remove the logo plate from the center. To do this, one has to rotate the wheel to the proper position, so that a hole in the wheel lines up with a hole on the bottom of the steering column (pictured). Then one simply inserts a tool (in my case, a straight clipped-off piece of a coat hanger) through the pair of holes, poking at the logo plate from behind, and it pops right off.


And the logo plate is off! The horn ring kind of floats in the hub, so it pops off as well.


I got a bit ahead of myself and didn't take proper photos of the contact plate (beneath the horn ring) and detaching the connecting wires. Here's the aftermath, the inside of the wheel hub.


Next off is the hex nut holding the wheel in place, and then the locking plate behind said nut, still present in the above photo.


The wiring that runs up inside the steering column - this pulls out with a bit of oomph and audible crackling of the old nasty sheathing.


Now to get the wheel itself off. Depending on how tight the wheel itself is attached, sometimes they can be pulled away by hand. My neighbor Ernie yanked one off the second Ponton he acquired and stripped down not long ago; the trick is to leave the hex nut threaded on partially, to prevent the wheel popping off and slamming you in the face while you're tugging on it. I tried this several times, but my wheel had a deathgrip on the steering column - no go.

So, I contacted Len, a fellow Pontoneer, and asked if he would loan me his steering wheel puller tool, and he agreed. The trick with Len's tool is, the gaps between the raised ridges around the bottom of the tool are too small to properly fit within the hub.


Fortunately, Harry in LA had also borrowed Len's tool at one point, and had the solution: shave down part of one of the three tabs inside the hub.


To get the tool in now, I insert it at a bit of an angle, and then give it a bit of a pop to get the tool past the shaved tab. In it goes! At this point, the tool is spun a few degrees, to slide the raised ridges into the slots behind the three tabs.


The next step is to crank down on the tool, pushing against the steering column, and pulling on the tabs, to pull the wheel away. The instructions say to crank on the tool a few degrees, and then pop the end of the tool with a hammer a few times, rinse, repeat - otherwise you risk fracturing the wheel itself.

Alas, cranking on the tool tends to cause the tool itself to spin inside the hub, with the raised ridges sliding out from behind the tabs. A trip down to Harbor Freight to pick up a rubber strap wrench later, and I find that this is really a three-hand job; 1) Hold the wheel itself steady 2) Hold the strap wrench on steady 3) Cranking/whacking the puller tool. Fortunately, my neighbor Richard has a few minutes free that evening and he wanders up.


After a couple of aborted attempts, the two of us succeed in getting the wheel off!

The steering wheel itself is in pretty poor shape. Cracks and separations all around the outside, and the hub itself has several large cracks. Richard knows of a place to send the wheel to get it repaired - and the cost of said repair is nearly as much as purchasing a new wheel. This is a decision I'll make later.

Monday, October 25, 2010

Ventilator insect screen/lining removal

While removing the front panel, I managed to dislodge some more dirt out of the ventilator air scoops, so I figured while I'm in the neighborhood... let's get these cleaned out.


A photo up inside the driver's side scoop. Dirt, leaves, and the remains of the liner.


First task is to remove the insect screens at the rearward ends of the air scoops. They're held in place with wingnuts. They refuse to budge until I get a pair of pliers out and give them a twist. One comes out easy - the other, sadly, snaps off. I'll have to drill the remains out.


And out it comes. And now the sheer amount of crap that has accumulated in the scoop is more evident.


Insect screen. Aside from a small hole in the middle, it appears to be in good shape. The passenger side screen is a bit better off.


Once the screens are out, it's easier to push the detritus out from the rear end of the scoop, and to pull the old liner material away where it's still glued. This is the pile of crap that was in the driver's side scoop.


The passenger side scoop is equally occupied.


Fortunately, the liner material in the passenger side scoop came away largely intact - I'm holding onto it so I can use it as a pattern later to fashion liners from new material.


The insect screens also had some strips of simliar material glued on each side where it meets the scoop - padding to prevent vibration and noise, I figure. Also holding onto a set of these to use as patterns later.

Front panel and bumper mounts removal

Next up is to remove some bits from the front end - the front panel, and bumper mounts.


The front panel is the body part pictured above, that runs between the two front fenders and beneath the grille. The front bumper mounts poke out through the holes on either side.


The front panel is mounted to each fender with four bolts/nuts (which are a huge pain to remove if you don't have the car up on a lift, due to tight quarters). Another bolt on each side passes through the shell and is held with a nut held down by a clip (seen just above and to the left of the leftmost of the four bolts pictured). These clips, naturally, gave up the ghost and began letting the square nut spin - so they had to go, and vice grips attached to hold that nut steady as the bolt was removed.


One more bolt, right in the middle, needs to come off.


And then, a bit of wiggling (to loosen up the rubber seals between front panel and fenders) and the panel is free.


The seals between the front panel and the fenders. From the illustration in the old dealer parts book, I'm guessing these pieces originally came straight. I'm going to hold onto these seals, to use as patterns in case I need to use something different as a workable replacement.


The last bits to come off are these pieces, one on each side. I'm unsure at the moment what they're for - I'm guessing as supports for the front panel. I'm not finding them in the old parts book PDF where the front panel is listed.


Now I can easily remove the bumper mounts. Each one is held with a pair of 17mm bolts. These come loose with a sufficient application of penetrant and oomph.


Bumper mounts removed. Note the left one is missing the part pointing toward the bottom of the photo - this part broke away when I first removed the front bumper. And the right mount is bent in somewhat in about the same spot. I'm guessing at some point in the distant past, the bumper took a fairly good hit, and the mounts took a fair amount of the impact, bending in the process. I'm going to look into replacing both - the left mount out of necessity, the right out of caution.

Fuel change-over cock/filter removal


Removing the fuel change-over cock is a fairly simple task. Just a matter of disconnecting a few feeds and a couple of bolts.


First thing is to detach the reserve switch post. This changes which fuel line the filter draws fromg. It's held on with a spring clip, much like the door latches were.


Next is to disconnect the fuel lines (surprisingly easy - they didn't require too much pushing) and the hose from the fuel filter to (what I believe is) the fuel feed pump, and then to remove the two bolts beneath the change-over cock that holds it to the body.


Fuel change-over cock removed. The old filter came out in a puff of orange residue. I think it's done.

Front windshield removal

Time to get on removing the remaining glass on the car - the front and rear windshields. First, the front windshield.


The rubber seal on the front windshield has been shot for years. It was so bad that leakage on the sides caused water damage on the main wood dashboard, and the two smaller wood pieces below that hold the vent levers, to the point that I picked up replacement parts from a fellow Pontoneer.

To get the windshield out, basically I just have to take a flathead screwdriver and pop the seal away in pieces. In the above photo you can see where the seal has cracked and separated in some places, and on the top left, where I've already snapped a part of it away. A few more minutes of attacking the formerly-rubber seal and the windshield comes free.


No more windshield.


The removed windshield, still with a fair bit of the seal remaining. Next task is to get the trim out in one piece.


The seal remnants are so brittle that it's just a matter of picking it off piece by piece.


Windshield and surrounding trim. The trim itself is in good shape, with the exception of a fairly large notch along the bottom, near the middle. I imagine this is thanks to a rock some years ago. If I can find a replacement piece for a good price, I may just replace it.

Sunday, October 10, 2010

Other updates

Lately I've connected with a couple more fellows on the Ponton list: Harry in California (mentioned a few posts earlier) and Jeff in Massachusetts.

Harry's got a '58 220S that he's willing to sell me some parts from. My plan right now is to buy several pieces from him:

* Both entrance sills (to cover the rusted out outer trim mount holes, and the driver's side rusted step area)
* A partial set of outer door/sill trim (that will, with the partial set I currently have, make a complete set)
* Both front fenders (the headlight areas on mine are both degraded, plus I have some body damage on the left fender - the headlight areas are more important)

The fun bit will be getting the fenders from Los Angeles to here in Denver. I'm pondering going the Craigslist route - they have a rideshare section, for people who are driving from X to Y, and looking for a passenger to help share costs - or folks looking to be a passenger. I may just post a note on there when the time comes, looking for someone heading this way who has spare cargo space to haul the fenders. The other options are have them shipped, or simply roadtrip down and pick them up. It's only a thousand miles each way...

Jeff is a fellow who recently posted on the Ponton list that he had found a scrap yard in his general vicinity (well, an hour away from him, he says) that has several old Pontons in varying condition. I've gotten the contact info of the yard owner from him, and will be contacting him this week. Jeff also mentioned another fellow he's met who has three Pontons he's looking to part out. I may have to inquire on this front as well.

Jeff was kind enough to travel to this yard and snap a lot of photos:

http://s947.photobucket.com/albums/ad313/plumbumponton/Ponton%20Parts%20Cars/?action=view&current=a2d41237.pbw

From these cars, I'm hoping to acquire a few goodies: the tail lights off the baby blue car (photo #10) and a steering wheel off either of two cars (photos #53, or #40). I'm also hoping to snag a full set (off various cars) of intact door lock posts - ones that still have the black rounded bakelite caps in place. My posts in OK shape, but missing those caps. I know, cosmetic, but it's one of those things, y'know?

Headliner mounting rails/bows removal

As time has progressed over these past few months, every now and again I would grab at some random scrap of headliner that was hanging down and just tear that sucker out. The headliner has been toast on this car for decades. Now it's time to get the rest of it all out.


First up are the mounting rails that run along above where the doors fit.


Each side has four rails of varying shapes/sizes, held down with screws. Most of these come out easily, but a couple at the rear end, caked with glue from the previous headliner, are a bit tougher to extract.


Passenger side headliner mounting rails, laid out in order.


Now that those rails are removed, I should be able to get the center mounting posts of the grip rails out as well (located just above the pillars).

Next task is to remove the metal bows that run across the top of the passenger compartment.


There are seven of these bows across the top of the compartment. As best I can tell from reading some related webpages, the headliner should have sleeves that these bows slide through to hold it in place. Those sleeves are like the sleeves in camping tents, that the collapsable supports are slid into and out the other side, I'm guessing.

Here's an article on the Ponton site that will no doubt come in handy when the time comes to install a new headliner:

http://www.mbzponton.org/valueadded/maintenance/headlnr.htm


I don't know if it's just age or what, but I can't get a good purchase on these bows to pull one end out - so I end up rotating them downward, and then one end pops out easily.


All seven bows out, and the more solid remains of the padding strips are out.