Wednesday, September 29, 2010

Trunk lid, hinges, and tail light wiring

I decided to mix things up a bit and to start doing some work on the rear end of the car. First, the trunk lid.


The lid itself is in pretty good shape - there's one big, shallow dent centered on the passenger side license plate mount. Should be easily addressed. The car is still pretty filthy from when it was transported out last year, partly during a blizzard.


The trunk-mounted badge comes away easily, just a bolt/washer on the inside of the lid. Another part for the rechrome pile.


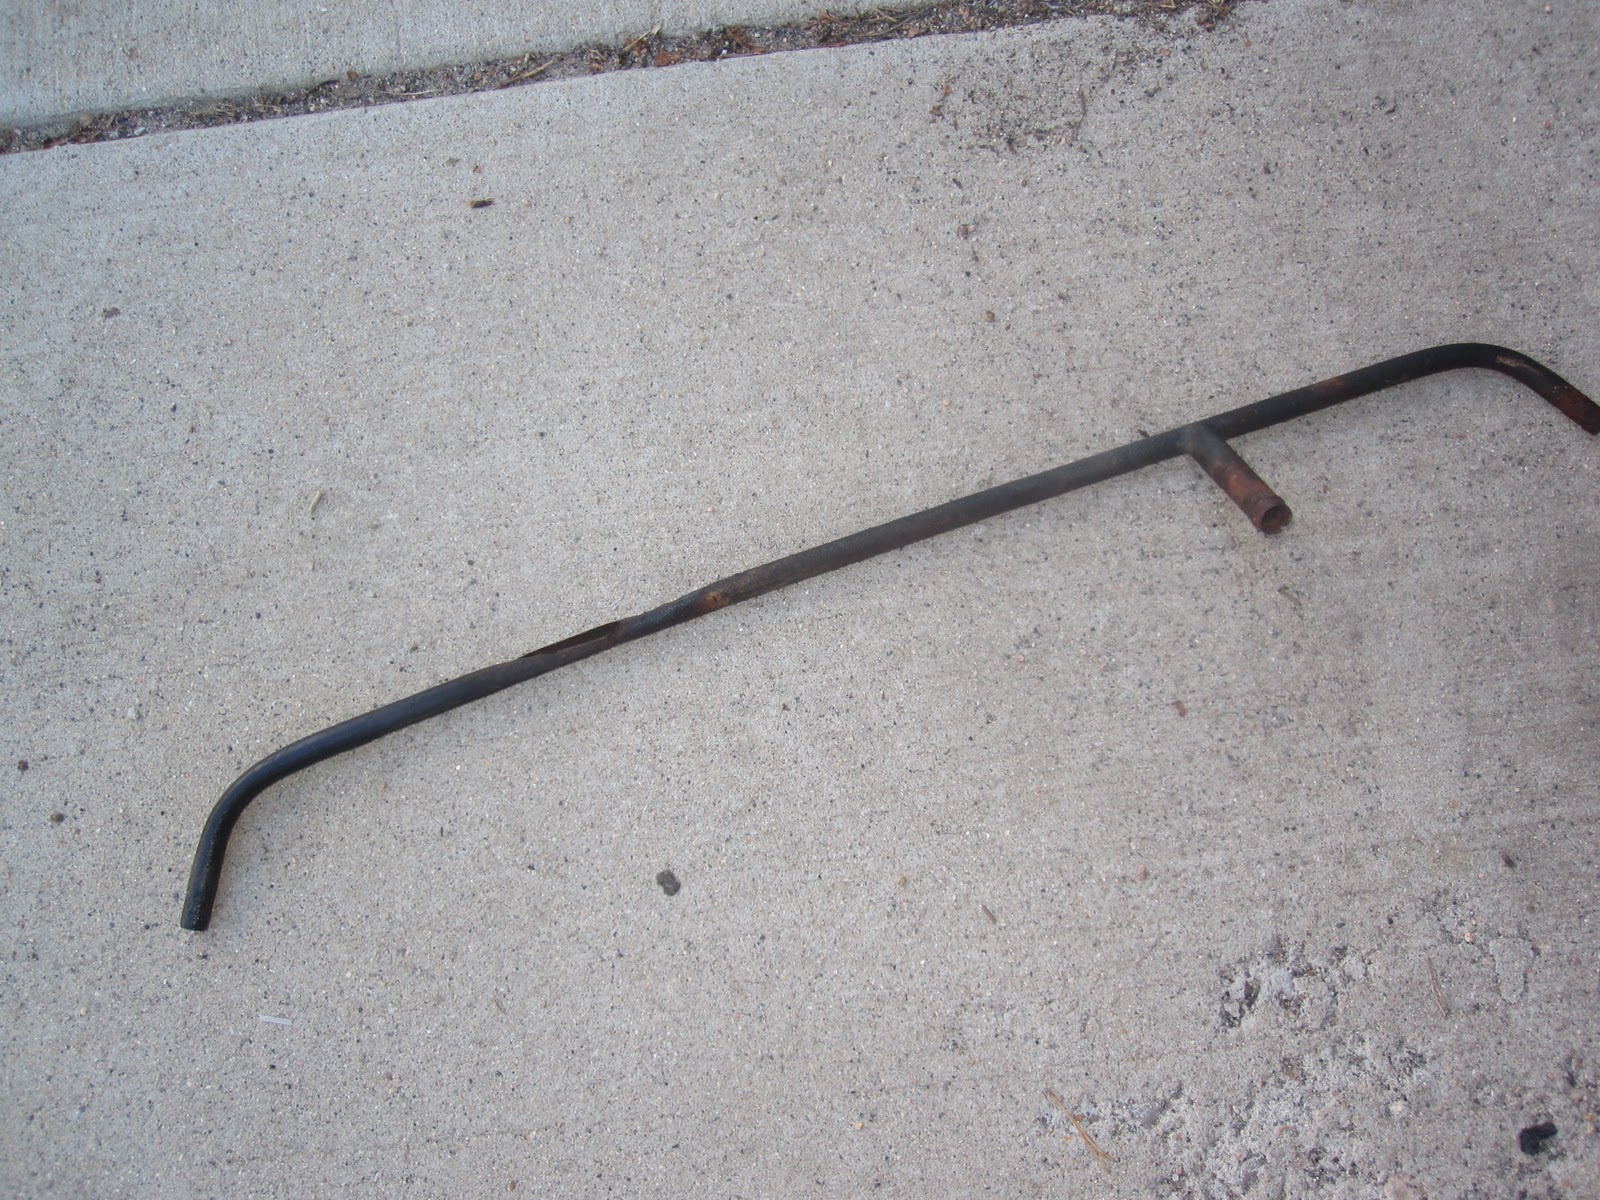
The license plate mounts also come off easily. On the outside there's a pair of rubber grommets. I will probably go with a better solution all around in the end (a plate frame or somesuch). This shot is of the trunk lid while it's up and open, hence the funky perspective.


The trunk lid is attached to the hinges with three hex bolts each. These loosened up easier than I expected. And with the help of my neighbor Frank, we got the lid off and set aside.


The trunk hinges mount to the body with three more hex bolts. Two are to the rear, right by the hinge itself; and getting a 10mm long socket up into the gap between the sides of the mount and the spring was a tight fit. The third hex bolt is on the other end (toward the front of the car) - this one only needed to be loosened, as the mount on that end has a slot, not a hole. The mount slides out once the rearward bolts are removed and the forward bolt loosened.


Trunk lid hinges removed. There's no paint on the mounts on the tops, or on the body where the hinges were mounted - they were attached prior to the car being painted. I assume the springs went in post-painting.


While I'm back there, I started puzzling out the electrical side of things. Wrapped wires come in from the back of the passenger compartment and up along the driver's side, where there's a split for each set of tail lights.


The wires are held in place with clips that are themselves bolted on. I figure I'll have to bend the clips out to extract the wiring before unbolting the clips.


Here's where some of that wiring (there's another small split above) comes down to a cable connector. This whole area is caked with dirt and grime - it takes a little umph to loosen the screws and free up the wire ends and remove the connectors.


Last bit is to remove the remaining screws/nuts, which is attached just above where the connectors were - I assume this is a ground wire.

I won't be able to do more on this end until I get the wiring out of the tail light shells - and that will be interesting, considering what caked-up messes those areas are, due to the rear tires slinging various types of goo up there to harden up. I'll likely have to jack up the rear end on each side to get enough access underneath as well.

Monday, September 27, 2010

Brake Booster and Mounting Plates, Choke Cable, Ventilation System Feed Lines

Now to remove the brake booster!


Looking at it before, I figured this was going to be a bear of a job - but as it turns out, it was pretty simple. First thing is to remove the two brake fluid lines. Those were on pretty good - it took some muscle to loosen up those nuts.


A vaccum hose that loops over and connects on the other side of the engine comes off next.


Now to remove the nut/washers that are holding the rear mounting clamp onto the back of the booster.


And now the whole unit is free, and slides out easily.


Now that the booster is out, I can remove the plate it was mounted to. Front shot...


...and back. This plate is held on by four hex bolts (two on each side). Despite the grime, these loosen up fairly easily.


And this hose, which connects to a metal hose that attachs to the instrument cluster, needs to be disconnected. From what I can tell, this is an oil pressure gauge line.


Plate and other hose removed. I figure separating the two will be far easier out of the car.


And now this cable is quite exposed, and a target for removal. It snakes through a hole in the firewall...


...and connects to this dashboard switch, which is the choke control. It's just a matter of removing the circular piece from the engine compartment side, and the two leads from this piece...


...and it slides right out through the dashboard. Circular piece threads back on for easy storage.


Now that all that gear is out, I can finally extract the feed/return lines for the ventilation system. Said lines are the slender metal pipes running horizontally, partially obscured by the engine in the above shot.


Return line. It may be tough to see in this pic...


...so here's a closer shot. This line has a huge gaping hole in it. :/


Here's the feed line. No obvious holes, but I still wouldn't want to put this piece back in and run hot coolant through it. I'll likely find someone local who can fabricate proper replacements for these two pieces.


And a shot of the engine compartment post-mass-removal. It's coming along... as a contrast, see a pic from late last year of the engine compartment before disassembly began.

Regulator switch

Next to come out - the regulator switch.


This unit (left) is wired up to the generator (right). Some of these connections were easy enough to get off - others, not so much. The one remaining wire attached to the switch (bottom-most connection) I simply couldn't get a very good purchase on, until the unit was out of the car. And the wires attached to the generator were also somewhat difficult - the left-most one, the post itself kept spinning while trying to loosen the nut. It took getting a decent grip on the base with a needlenose pliers before this one would budge. And the connector on top, with the flathead screw? Fuggedaboutit. I caved and clipped that one. It's a short bit of wiring, which I'll end up replacing in the end anyhow.


Removing the switch itself entailed extracting a pair of bolts on one end, and then sliding the other end of the unit free from what appears to be another flathead screw, which has a little gap beneath. I'll have to inspect this later and get it out, if it's out-get-able. The whole switch sits above a plate that appears to be welded to the body.


Regulator switch out.


Inside of the switch. There are some fine filaments going from the tab in the center to wrap around the white bar at the top. Everything looks ok, from a cursory visual inspection; but I'm no expert. :/


The two mount bolts passed through an odd pair of rubber/metal grommet pieces, which have a groove down the center so as to slide onto the switch body.


Said grommets. One is in good shape, the other not as good. Will have to see about finding suitable replacements.

Second horn, ignition coil, spark plug cable removal

Next to come out is the second horn (first was removed months ago), the ignition coil (newbie alert: I had to look in the old parts book PDF to find the matching illustration to figure out what this sucker was!), and the spark plug cables.


A shot from above of the horn and coil. The coil is attached to a thin plate with another plate that wraps around; the other plate is held to the body with a pair of bolts, which come away fairly easily. The cable on the top and the wire (behind the thicker top-end cable) both attach to the distributor.


Cable to distributor removed. Many of these cables took a bit of wrestling to get the rubber to release its grip.


The distributor cap and visible internals are far too clean and new looking to be original. I imagine my cousin replaced this whole unit some years ago.


Now that all the cables are free from the distributor cap, they are easily popped off the spark plugs - and the tube holding the cables is mounted with a pair of bolts, easily removed.


The wire from the ignition coil is the red one. Don't clip the red wire! This one detaches easily as well, and the ignition coil is free.


The horn was a fun one to remove - now that the ignition coil is out, I can get a socket wrench on that nut. Getting a crescent around the bolt head was trickier - I never could quite fit it in fully, but I managed to get enough purchase to hold it steady.

Radiator removal

Some time back, I had essentially freed up the radiator from all connections; but I had never gotten around to removing it entirely. Today's the day.


There are four mount points - two bolts from beneath, and then two of these sets of two bolts. The nuts are on the top...


...with the bolt heads beneath. A bit of penetrant on the bottom bolts was in order, and everything came away with a minimum of hassle.

And then it's a matter of sliding the radiator straight up and away.


The bolts on the bottom have rubber grommets on both sides of the attached plate; these, as pretty much 99% of the rubber on this car, are dried up and brittle. A bit of poking with a screwdriver and they break away.

Ventilation lever/flap hardware

Out comes the remainder (as best I can tell) of the ventilation hardware.

The driver's side heater box had disintegrated, and I had tore out most of it some time back; what was remaining was the rearward-most part, with the flaps, and the squarish end plate that is bolted onto the inside of the engine compartment. One of those bolts was being difficult and I feared stripping it. Fortunately, with sufficient application of penetrant (both on the outside, and from within, once I began poking about a bit), I was able to get this bolt loose.


Said plate was held on with three small bolts that were driven in from above, and one longer bolt that goes in on the underside of the dash. On the driver's side, this bolt also holds on this foot-switch (not 100% sure what this switch does as yet). The presence of the switch meant a socket was out of the question - it took a few minutes working at this bolt with a crescent wrench to get it out.

In the above photo, you can also see a piece at the top right - this is a flap that closes over the vent hole where the heater box attaches (via the plate just removed). Each side has a pair of Phillips screws that came out reasonably easily.


Passenger side flap.


Flaps removed. Note that the flap on the left has a spring piece across the top - I'm pretty sure I found the other clip months ago, just laying around - once I get a bit more organized, I'll be doing a hunt for it in the mess-o-stuff that has been building up.


Now to remove the ventilator flap control hardware. Three cables with housing enter through the rear of that area, and the cables are attached to each lever. The whole lever assembly is held on by a pair of 7mm bolts that thread through removable clips. Fortunately, they're removable - the pair on the passenger side snapped off in mid-removal! But since I was able to remove the clips (with the aid of my ever-helpful neighbor Frank), I should be able to get the remnants of the bolts out at some point.


Each cable's housing is held in place with clips. The cable ends are easily freed, but freeing the housing from these clips is a bit more work. These clips are more easily seen above.


Lever assemblies removed. Into yet another baggie with them!


Now to remove the cables themselves. Each side has a circular rubber piece with three holes in a triangle that the housings pass through. Here's a shot from inside...


...and a shot from outside. The cable housings just slide right on out from this end. The rubber piece comes out fairly easily as well. The rubber seems to be in decent enough shape, so I'm hoping it doesn't require replacing. It's an odd piece to be sure.