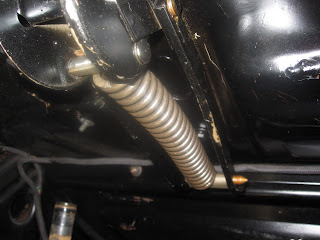
I decided to mix things up a bit and to start doing some work on the rear end of the car. First, the trunk lid.
The lid itself is in pretty good shape - there's one big, shallow dent centered on the passenger side license plate mount. Should be easily addressed. The car is still pretty filthy from when it was transported out last year, partly during a blizzard.
The trunk-mounted badge comes away easily, just a bolt/washer on the inside of the lid. Another part for the rechrome pile.
The license plate mounts also come off easily. On the outside there's a pair of rubber grommets. I will probably go with a better solution all around in the end (a plate frame or somesuch). This shot is of the trunk lid while it's up and open, hence the funky perspective.
The trunk lid is attached to the hinges with three hex bolts each. These loosened up easier than I expected. And with the help of my neighbor Frank, we got the lid off and set aside.
The trunk hinges mount to the body with three more hex bolts. Two are to the rear, right by the hinge itself; and getting a 10mm long socket up into the gap between the sides of the mount and the spring was a tight fit. The third hex bolt is on the other end (toward the front of the car) - this one only needed to be loosened, as the mount on that end has a slot, not a hole. The mount slides out once the rearward bolts are removed and the forward bolt loosened.
Trunk lid hinges removed. There's no paint on the mounts on the tops, or on the body where the hinges were mounted - they were attached prior to the car being painted. I assume the springs went in post-painting.
While I'm back there, I started puzzling out the electrical side of things. Wrapped wires come in from the back of the passenger compartment and up along the driver's side, where there's a split for each set of tail lights.
The wires are held in place with clips that are themselves bolted on. I figure I'll have to bend the clips out to extract the wiring before unbolting the clips.
Here's where some of that wiring (there's another small split above) comes down to a cable connector. This whole area is caked with dirt and grime - it takes a little umph to loosen the screws and free up the wire ends and remove the connectors.
Last bit is to remove the remaining screws/nuts, which is attached just above where the connectors were - I assume this is a ground wire.
I won't be able to do more on this end until I get the wiring out of the tail light shells - and that will be interesting, considering what caked-up messes those areas are, due to the rear tires slinging various types of goo up there to harden up. I'll likely have to jack up the rear end on each side to get enough access underneath as well.
Subscribe to:
Post Comments (Atom)


No comments:
Post a Comment